
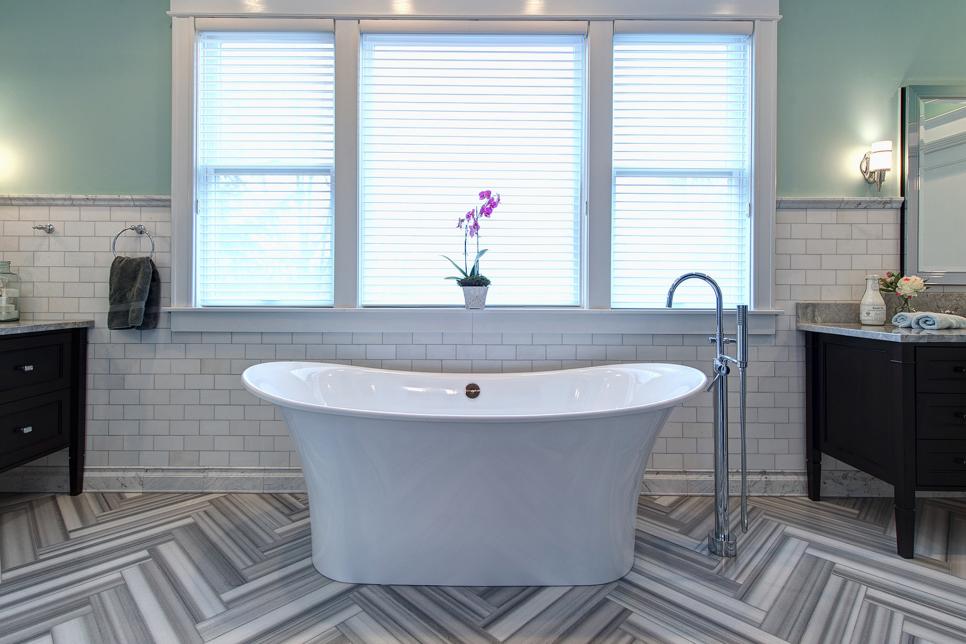
Marble, Marble and More Marble Designer Mark Williams creates the slipper bathtub the star of the luxurious bathroom by tucking it into a tile-covered arch beneath a oversized Palladian window. Larger 9 x 18 Carrara marble tiles surround the window while bigger marble subway tiles line the arch. To finish the standard look, Mark chose Cararra marble and black walnut basketweave tiles for the bathroom's floor.

Set the Focus Although you may mistake the herringbone flooring in this stylish bathroom for wood or possibly a painted detail, it is really marble which designer Joni Spear had painstakingly cut to 4-inch-wide planks then put in a particular sequence to make the most of the color contrast between different regions of the rock.
Get Creative This modern and uber-hip small bathroom, made by Brian Patrick Flynn, is filled with outside-the-box ideas. In the picture pattern on the door, made by attaching wood planks, to the mosaic tile accent wall which Brian added to brighten up the dressing table area and make the walls feel taller.

Use Different Tile Shapes in Different Colors San Francisco Bay-area designer Kriste Michelini uses tile to make a split between the wet and dry regions of the restroom. She frequently experiments with unique combinations of tile and uses various tile shapes in the exact same marble substance to create a sense of boundless space.
Focus on the Details Portland, Ore., designer Jessica Helgerson considers the tiny tiling details can make or break a space. For example, she finds it is important to carefully consider where the tile starts and stops. When there is not a clean way to end the tiling, she'll often take the tile all the way up the wall. This bath features one of the favorite tiles of Jessica.

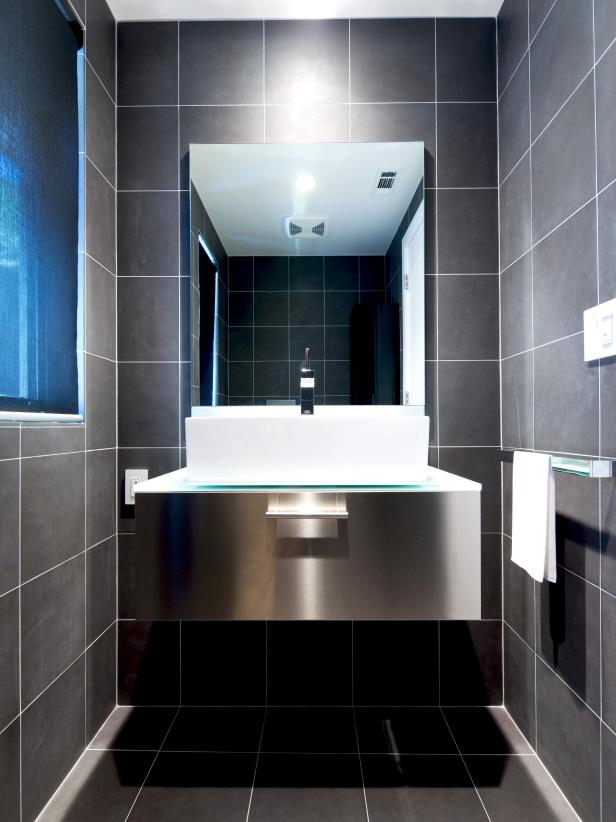
Keep Floors and Walls exactly the Same With this small toilet, Kriste Michelini creates a luxury hotel feeling by maintaining the floor and wall tiles exactly the same . The entire space is wrapped in a dark tile that is offset with a wall-mounted dressing table. Photo courtesy of Kriste Michelini
Play With the Trim Options In this toilet, Jessica Helgerson utilizes a 3 x 6 brick from Pratt and Larson's Straightforward Solutions, which is chosen for the great variety of trim options. For instance, the tile wainscot includes a decorative base and high cap, and another cap is used for the edge of the tub try here. She then uses black and white marble hexagon mosaics on the floor, making a decorative border with all the white tile. Photo courtesy of Jessica Helgerson

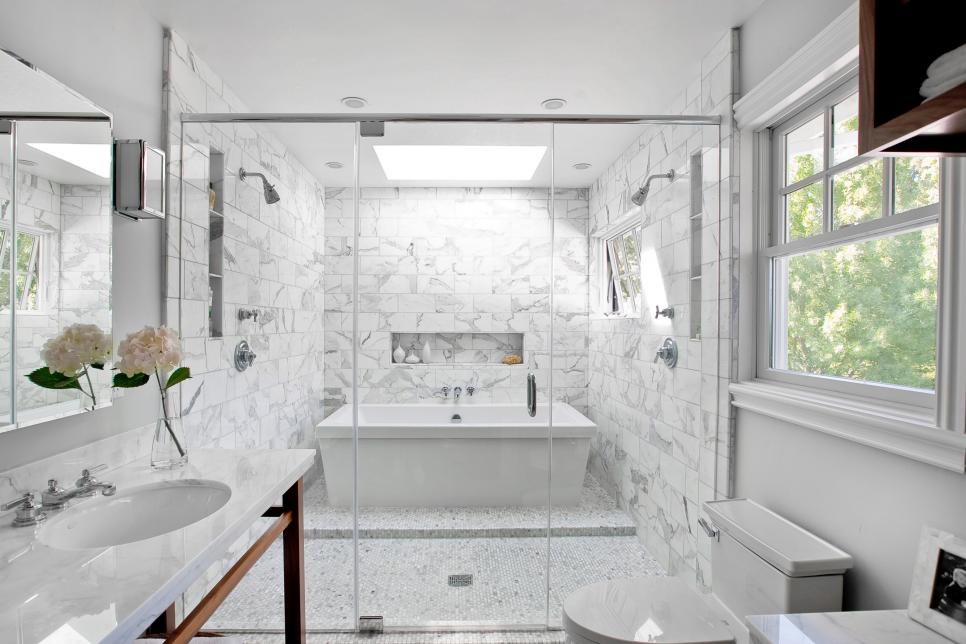
Create a Focal Wall Kriste Michelini suggests placing the shower market on precisely the wall as the shower fixture when tiling a shower. This permits for the main walls to be tiled beautifully without the disruptions or cut outs in the point you can find out more. In addition, she suggests continuing the bathroom floor tile over the shower curb and to the shower pan to enlarge the ground and keep it clean looking. Inside this bathroom, the customer wanted a beachy vibe, so Kriste uses a mosaic tile on the walls using small white subway tiles on the skillet go to this site. The bottom third of the shower door is frosted for privacy while the top is left clear to allow natural sunlight into the shower Website like it. Photo courtesy of Kriste Michelini

Use One Tile for Your Total Space Charleston, S.C., designer Cortney Bishop prefers to utilize 1 tile for the whole space for a means to create a cohesive look go to the website. If the scale of the selected tile is too large to use everywhere, Cortney cuts the tile down to scale to maintain the continuity then creates a spa-like feel by carrying the tile all the way to the ceiling.

Create a Spa-Like Effect When Cortney was introduced with the struggle of a massive bath, she decided to make a light and airy waterfall-like atmosphere. To achieve this, she has the glass tiles installed vertically and keeps the grout neutral. Bishop says, "As a general rule, less is more. Using one tile throughout a room provides a cleaner, more consistent look." Photo courtesy of Cortney Bishop

Use Tile to Produce Architectural Interest Jessica Helgerson uses Dal tile in a 3 x 6 white brick and selects a thinset rather than a thicker setting mattress. For additional detailing, the ceiling drops around the sinks to create just a niche that is wholly covered in tile click now. The floor is a limestone hexagon design which came with more variation than she expected but ended up adding a lot of visual attention. Photo courtesy of Jessica Helgerson

Pay Attention to the Tile Glazes Together with her husband, Brian, artist Edith Heath founded Heath Ceramics in Sausalito, Calif., in 1948. Their focus has been on bringing out the natural beauty of this clay. The company still makes tiles using the identical production techniques created by Edith in 1948. Photo courtesy of Heath Ceramics
Play With Various Colors of the Same Color For a trendy, watercolor effect, consider using two or even three distinct colors of glazed tile in the exact same colour family to create a tone-on-tone patchwork blog. Photo courtesy of Heath Ceramics

Height to be Created by install Tiles Vertically In this contemporary bathroom, the ceramic tiles are installed vertically to highlight the geometry of this space and provide the illusion of height. Additionally, by combining different tiles in similar colours, you further emphasize the size of the space when creating a sense of visual feel. Photo courtesy of Heath Ceramics

No comments:
Post a Comment